
Table of Contents
A clean vape pen tastes better and lasts longer — and cleaning it takes fifteen minutes. Take the tank apart, rinse the glass and metal parts in warm water, wipe the battery connection with a damp cotton swab, and let everything dry before you reassemble it. Never submerge the battery, and do not expect cleaning to save a dead coil.
What you need before you start
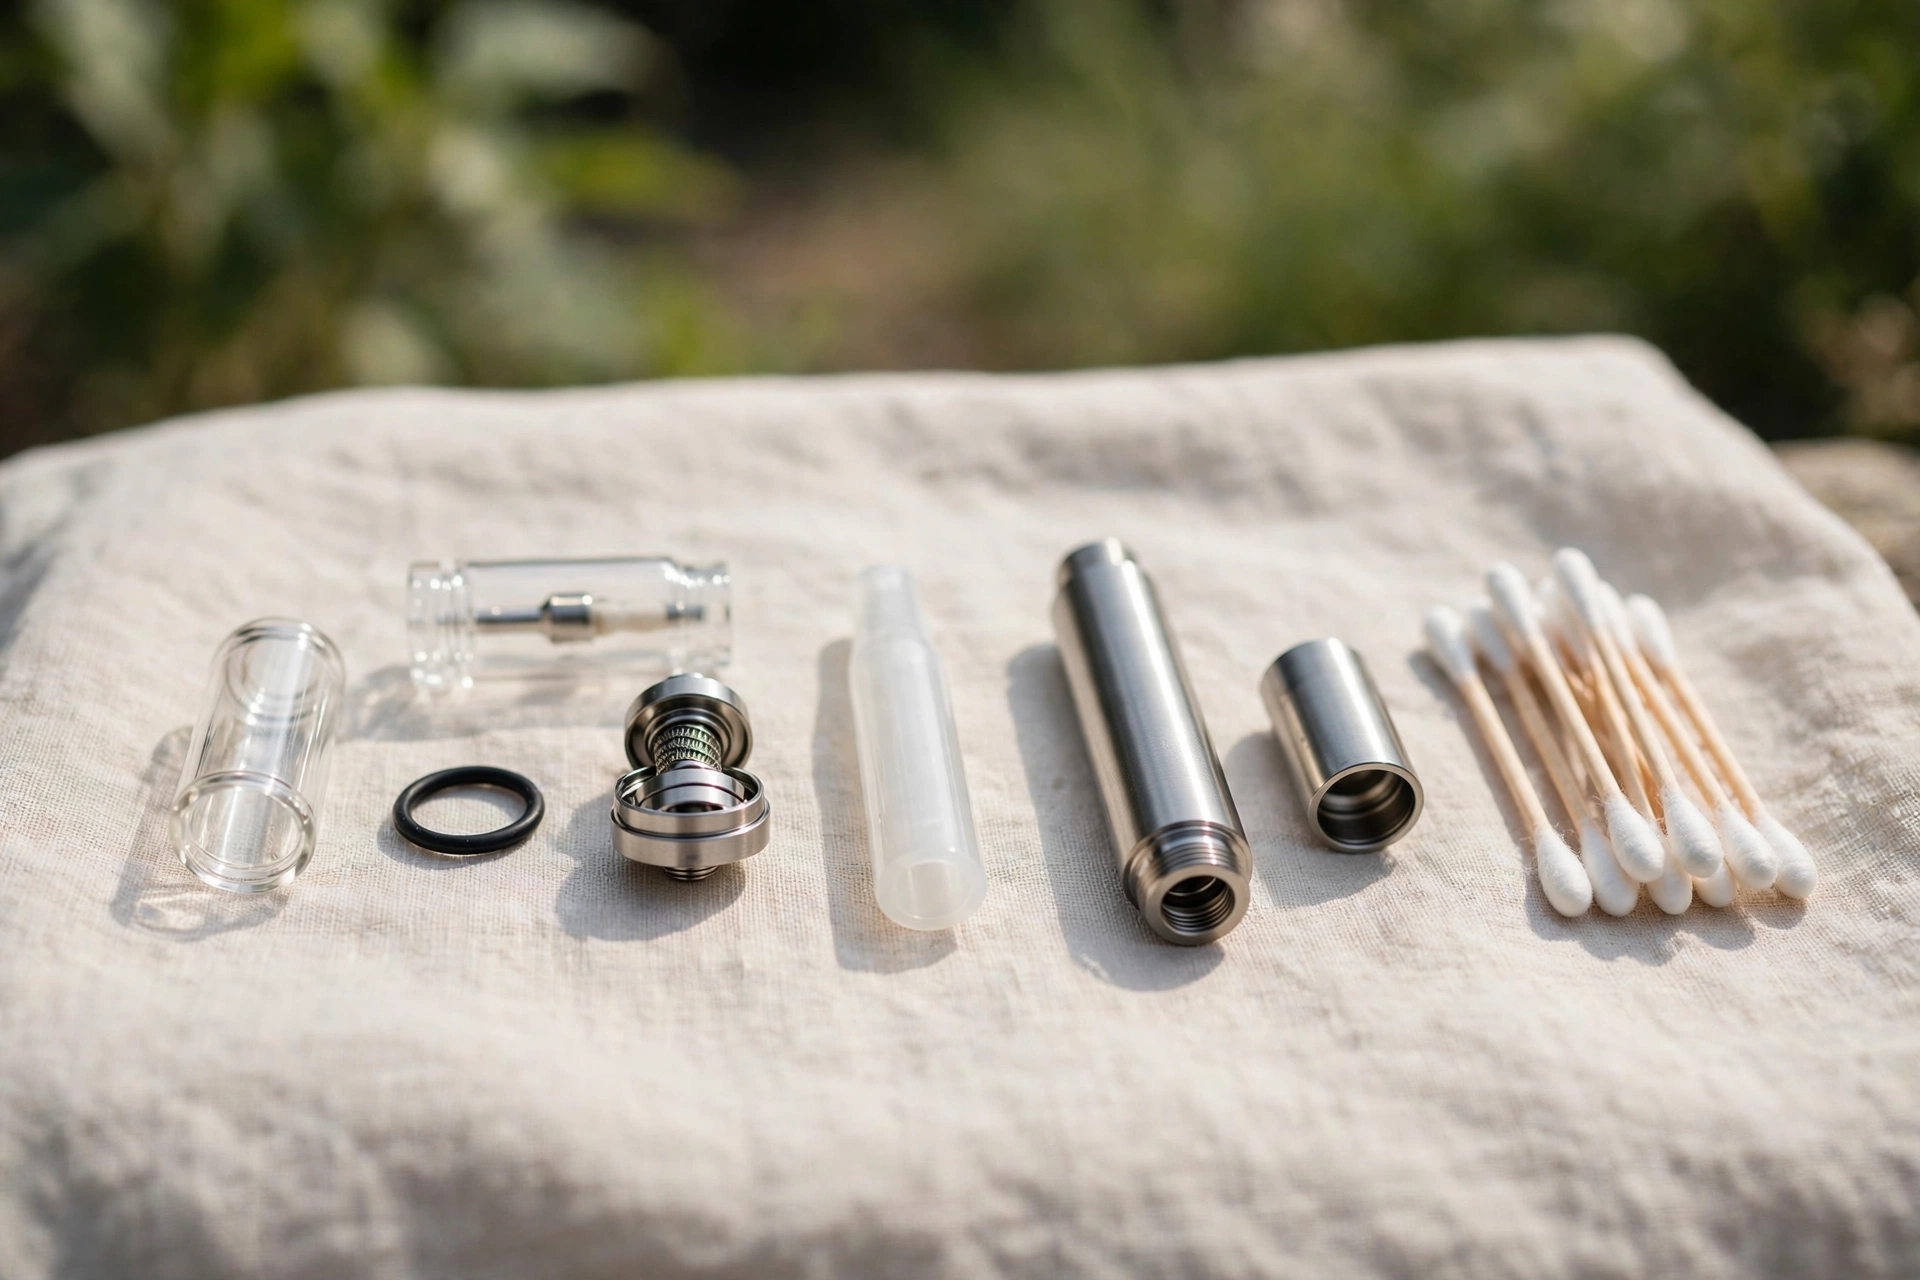
You do not need a kit. Gather warm water, a small bowl, a soft toothbrush or soft-bristled brush, cotton swabs, paper towels or a microfibre cloth, and — for a deep clean only — high-percentage isopropyl alcohol, 70% or higher. That is the whole list, and if you are missing the alcohol, the warm-water version below still covers most of the job.
Two things do not belong on the list: harsh household cleaners like bleach or glass cleaner, which leave residues you will inhale, and abrasive tools that scratch glass and threads. A scratched tank is harder to clean next time, not easier.
Clean when you switch flavours, when the taste goes dull, or about once a week if you vape daily — waiting until it gurgles or tastes burnt means cleaning up a problem instead of preventing one.
Step 1: Power off and take it apart
Turn the pen off — usually five clicks of the fire button — and unplug it from any charger. Then unscrew the tank from the battery and set the battery aside somewhere dry, well away from the sink. Take the tank apart: mouthpiece off, glass tube out, base unscrewed, and the coil removed and set on a clean paper towel.
Pay attention to the O-rings as you go. They are the small rubber gaskets that stop your tank leaking, and they are easy to lose and annoying to replace. Note where each one sits, keep them together, and check that none is pinched or cracked when you put everything back.
Disposables are sealed units — nothing safe to take apart. If yours blinks instead of firing, our guide to why a disposable vape blinks will help you work out whether it is flat, flooded, or finished.
Step 2: Rinse the tank and mouthpiece
Hold the glass tube, the base, the top cap, and the mouthpiece under warm running water. Use your fingers or the soft toothbrush to work off any visible residue, especially around the threads and the inside of the chimney — the tube the vapour travels up. Warm water is enough for a routine clean; avoid boiling water, which can damage the O-rings.
Do not get the coil wet if you plan to keep using it. Water degrades the cotton wick inside, and a wet coil is a coil on its way out. Set it aside dry, and deal with it in step 5.
Pat everything dry with a paper towel, then leave the pieces out to air dry for at least an hour. This is the step people rush, and it is the step that matters most: reassembling a damp tank traps moisture where it breeds stale flavour and, in the worst case, leaks into the battery connection.
Step 3: The deep clean, for stubborn gunk
If warm water leaves a sticky film — usually hardened sweetener or thick VG residue — it is time for the alcohol bath. Put the disassembled metal and glass tank components into a small bowl of high-percentage isopropyl alcohol and let them soak for 20 to 30 minutes, or up to one to two hours for heavy build-up. Scrub the threads and airflow holes gently with the soft toothbrush, then rinse everything thoroughly under warm water and air dry until no alcohol smell remains.
Here is the rule that saves your seals: never soak rubber O-rings or plastic pods in alcohol. Alcohol dries rubber out and can make it crack or warp, and a cracked O-ring is a leaking tank. Remove the O-rings before the soak, or rinse them in warm water only.
Our guide to cleaning your vape tanks covers the same routine in more detail, including how often each part needs attention.
Step 4: Wipe the battery and the 510 connection
The battery section holds sensitive electronics and must never be submerged in water or cleaning solution — not the battery, not the power section, not the charging port. Doing so can permanently damage the internal circuitry and creates a genuine safety risk.
What does need cleaning is the 510 connection: the threaded well where the tank screws onto the battery. It collects leaked e-liquid and condensation, and a dirty connection is one of the most common reasons a pen misfires or reads the coil wrong. Dampen a cotton swab with a tiny amount of isopropyl alcohol, wipe the threads and the circular centre pin at the top of the battery, then buff the surfaces dry with the dry end of the swab. Do the same for the matching threading on the bottom of the tank.
Wipe the outside of the battery with a dry cloth. If liquid has got inside the battery compartment itself, stop using the device and get it checked — do not try to dry it with a hairdryer or a radiator.
Step 5: The coil — clean it, or call it done?
Here is the hard truth: coils are disposable, and cleaning one rarely restores its flavour. Once the cotton wick is scorched or soaked in heavy sweeteners, rinsing will not bring it back. Vapor Authority’s vape pen cleaning guide puts it plainly: replace the coil every 1–2 weeks, because cleaning it rarely restores flavour.
If the coil is only lightly used, you can try a gentle rinse under warm water, shake out the excess, and let it air dry for a full 24 hours before using it again. But if it tastes burnt, gurgles, produces weak flavour, or has been in use for more than two weeks, replace it. A fresh coil is cheaper than the e-liquid you will waste trying to rescue a dead one, and our guide to the best vape coils explains what to look for when you do.
When you fit the new coil, prime it: add a few drops of e-liquid directly onto the cotton before installing it, fill the tank, and wait five to ten minutes before your first puff. An unprimed coil burns on the first hit, and that burnt taste never washes out.
Step 6: Reassemble, check, and prime
Put the tank back together in reverse order, checking that each O-ring sits flat in its groove — a pinched O-ring is the most common cause of a leak after cleaning. Screw the tank onto the battery firmly but gently; overtightening strips threads and cracks glass.
Fill the tank, wait for the fresh coil to soak, and take a test puff. If the flavour is clean and the draw is smooth, you are done. If it gurgles, the coil may be flooded: take the tank off, blow gently through the mouthpiece into a paper towel, and try again. If it still tastes off after a clean and a fresh coil, the problem is probably the e-liquid itself, not the pen.
Mistakes that ruin a good cleaning
The most common mistakes are all versions of impatience. Reassembling while parts are still damp. Soaking O-rings in alcohol until they go brittle. Drowning the battery connection instead of wiping it. Scrubbing glass with something abrasive. And the classic: cleaning a burnt coil three times instead of replacing it once.
The other mistake is cleaning the wrong problem. A pen that tastes burnt after cleaning usually has a dead coil, not a dirty tank. A pen that leaks after cleaning usually has a pinched O-ring or a flooded coil, not a dirty thread. And a pen that will not fire at all usually has a dirty or damaged connection — or a flat battery. Our guide to fixing a clogged vape cartridge covers the next most common culprit when flavour and airflow go wrong together.
How often should you clean it?
For daily vapers, a quick rinse every time you change flavours — or at least once a week — plus a deep alcohol clean about once a month is a good rhythm. Light users can stretch the routine rinse to every one to two weeks. The coil, remember, is on its own clock: every 1–2 weeks, regardless of how clean the rest of the pen is.
Fifteen minutes a week beats replacing a tank you let go stale — make it part of the refill routine.
Frequently asked questions
Can I wash my vape pen under the tap?
Only the tank and mouthpiece — never the battery. Unscrew the tank, remove the coil, and rinse the glass and metal parts under warm water. The battery must stay dry; wipe its 510 connection with a barely damp cotton swab instead, and never submerge it.
Can I use rubbing alcohol to clean my vape pen?
Yes, on metal and glass tank parts only. Soak them in high-percentage isopropyl alcohol for 20 to 30 minutes, scrub gently, then rinse with warm water and air dry fully. Never soak rubber O-rings or plastic pods in alcohol — it makes them brittle and cracked.
How do I clean the battery connection on a vape pen?
Dampen a cotton swab with a tiny amount of isopropyl alcohol and wipe the threads and centre pin of the 510 connection, then buff dry with the swab’s dry end. Repeat for the tank’s matching threads. Never pour liquid into the connection or submerge the battery.
Can you clean a vape coil instead of replacing it?
Rarely with any success. A light rinse and 24 hours of air drying may help a lightly used coil, but once the cotton is scorched or soaked in sweetener, cleaning will not restore flavour. Replace coils every 1–2 weeks, and prime each new coil before use.
Why does my vape pen still taste burnt after cleaning?
Because the coil is dead, not dirty. A burnt taste comes from scorched cotton, and no amount of rinsing fixes that — fit a fresh coil and prime it properly. If a new coil still tastes burnt, check that you waited five to ten minutes after filling before puffing.
This article is general information, not medical advice. Vaping products are for adults of legal vaping age only. If your battery is damaged, swollen, or has been exposed to liquid inside the casing, stop using it and seek professional advice. See our medical disclaimer.
For a broader overview of vaping guides on this site, see our vaping and e-liquids hub.
Affiliate Disclosure
The CakeHeights Editorial Team is committed to providing accurate, research-backed information about cannabis and hemp products. Some links on this page are affiliate links, meaning we may earn a commission at no extra cost to you if you make a purchase through them. Our recommendations are based on independent research, testing, and analysis. We only promote products we believe offer genuine value to our readers. Learn more →

Related Articles
 Vaping & E-Liquids
MTL vs DTL Vaping: What’s the Difference?
 Vaping & E-Liquids
How to Quit Vaping: A Realistic Plan That Works
 Vaping & E-Liquids